This product is no longer available for sale
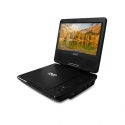
Be equipped to move with the PVS 702-69C player keeping with you your photos , movies and music .
Technical sheet
Download
FAQ
The monitor must always be powered via the power cables connecting it to the first screen which is the player (the monitor is the screen which does not have its own CD/DVD player).
The disc must be inserted into player A.
Check the following: o Remain within range of the player and point the remote control at the player. (Make sure you are directly in front of and close to the player) o Check that the battery has been correctly installed and replace it if necessary. o For dual players, check that you are using player A's remote control with player A and player B's remote control with player B. A letter located at the top of each remote control allows you to differentiate the remote controls.
Check the following: o Check that your disc is correctly inserted. o Check that the format of the disc is supported by the player (see packaging or instructions) o Check that your disc is not damaged or dirty. If it is dirty, clean the disc thoroughly. o Our DVD and Blu-Ray players play Region 2 DVDs and Region B Blu-Ray discs (European Region).
Our DVD players are not designed to work with external hard drives. You can easily connect a USB stick (up to 8GB or 16GB, as indicated in the instructions) to the player.
Our players play AVI format, but it may be that certain codecs are not recognised. (It is not possible to update these products)
Updates are not possible on our products.
The charge indicator does not indicate whether your device is on or not, just that your player is charging. Move the "ON/OFF" switch to the "ON" position.
We only supply the audio/video adapter. The audio jacks on our player are universal. You should purchase one from an electronics retailer.
If your model does not have a battery (check packaging), the player must always be powered via the mains.
This depends on the codecs of the burned files. If your burned disc does not play, try burning the disc with another format than that used previously.
It may be that the fuse in the cigarette lighter is faulty. If so, replace the fuse.
Check the following: o Check that mute is disabled. o Check that the volume on the player and/or the television set or amplifier to which it is connected is sufficiently high. o Check the sound settings on your television set or amplifier (see corresponding instruction manuals).
Check the following: o Check the output resolution of the player in the video settings. It may be that your television set does not use the maximum resolution of the player. o Check the input source (AV, HDMI, etc.) of the television set (see television set instruction manual).
Check the following: o Check your devices are properly connected. o Your disc is not recognised by the player (check the region of the DVD or Blu-Ray disc; the player only plays Region 2 DVDs or Region B Blu-Ray discs).
It is almost impossible to receive DTT on the move.
Check that you are in an area covered by DTT. The DTT transmission strength can vary from one region to another. Check that you are located in an area sufficiently clear of any obstacles which could affect reception, such as buildings, underpasses, tunnels, etc. Your device is equipped with a magnetic antenna. You can fit it on a metallic surface wherever possible, close to the outside or to a window.
Veiller à paramétrer l’extinction automatique de l’appareil sur une durée plus élevée ou sur jamais (peut être indiquée par la valeur « 0 »)
Procéder aux actions suivantes : • Vérifier que le bouton commutateur ON/OFF (si présent sur l’appareil) est sur ON • Brancher le lecteur et laisser le charger.
Procéder aux actions suivantes : • Il se peut qu’un fichier non supporté (type .exe ou .bat) soit présent à la racine du lecteur. Vérifier sur l’ordinateur le contenu de votre lecteur et supprimer les fichiers non supportés. • Si votre lecteur possède un bouton « Reset » effectuer un redémarrage du produit via ce bouton (vous ne perdrez pas vos fichiers après avoir effectuée cette manipulation).
Il se peut que la mémoire interne soit corrompue par un fichier, ou que le formatage de la mémoire ne soit pas dans le bon format. Dans ces deux cas, formater la mémoire interne en FAT 32 à l’aide de votre ordinateur via les options de formatage rapide.
Procéder aux actions suivantes : • Pour les modèles sans mémoire : Veiller à retirer la carte micro SD factice (si présente) et insérez une carte micro SD. • Pour les modèles avec mémoire : formater la mémoire interne en FAT 32 à l’aide de votre ordinateur via les options de formatage rapide.
Procéder aux actions suivantes : • Pour les modèles sans mémoire, veiller à retirer la carte micro SD factice (si présente) et insérez une carte micro SD. • Vérifier la capacité maximale acceptée par votre lecteur (information indiquée au dos de la boite d’emballage ou dans la notice). • Vérifier le formatage de votre carte micro SD, celle-ci doit être en FAT 32.
Vérifiez la protection en écriture de la carte micro SD dans les propriétés de la carte micro SD via votre ordinateur.
Si votre lecteur possède un bouton « Reset » effectuer un redémarrage du produit via ce bouton (vous ne perdrez pas vos fichiers après avoir effectuée cette manipulation).
Procéder aux actions suivantes : • Veiller à insérer le jack des écouteurs jusqu’au bout de la prise casque. • Veiller à vérifier l’état de vos écouteurs sur un autre appareil.
Les fichiers du lecteur sont triés par ordre alphabétique. Pour définir un ordre, la meilleure solution est de renommer les fichiers en utilisant la méthode numérique (01-Titre, 02-Titre, etc.). Cette opération se fait sur votre ordinateur.
Nos lecteurs ne sont pas compatibles avec les fichiers DRM.
Pour capter la radio, veiller à bien connecter le casque ou les écouteurs qui font office d’antenne (s’applique également aux modèles Bluetooth).
A l’aide de la notice, vérifier que vous avez bien activé le Bluetooth sur le lecteur et sur le périphérique annexe en mode de détection (voir notice de l’appareil) ensuite lancer une recherche d’appareil et sélectionner votre périphérique.